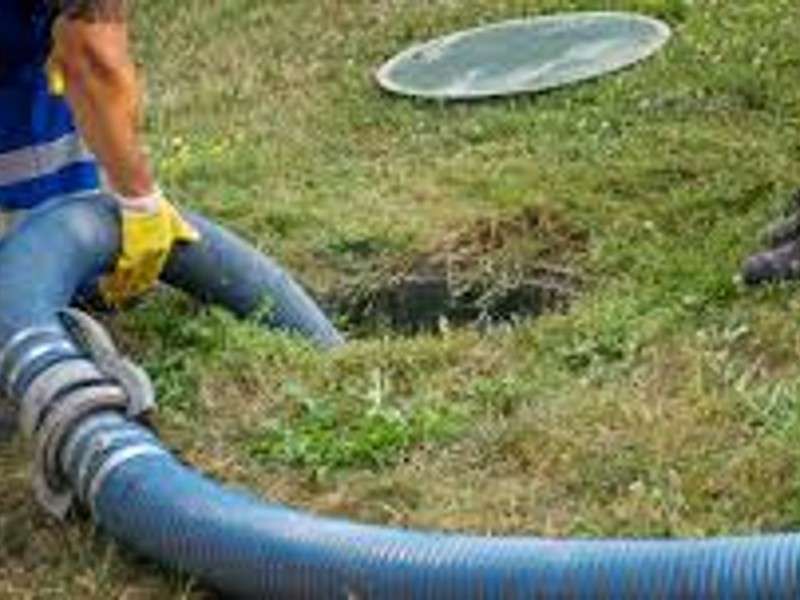
Looking to maintain your septic tank affordably? Learn the ins and outs of DIY septic tank treatment to ensure a healthier, long-lasting septic system.
Introduction to DIY Septic Tank Treatment: Because Your Septic System Deserves Some TLC Too!
Hey there, folks! Now, don’t let my gray beard fool ya—I’m not here to talk about old-school rock or how kids these days don’t appreciate a good carburetor. Nope, I’ve got something much more exciting to chat about—DIY septic tank treatment! Yessir, nothing screams “I’m a responsible homeowner” like getting down and dirty with your septic system. But why should you care, you ask? Well, buddy, let me tell you, a well-maintained septic tank is the unsung hero of any rural household.
Why Maintenance Matters
You see, your septic tank is like the digestive system for your home. It takes in all the “stuff” and breaks it down into manageable, ahem, output. If your septic system is under the weather, it can lead to clogs, back-ups, and a host of other nightmarish scenarios that you really don’t wanna deal with, trust me.
- Longevity: A little maintenance goes a long way in extending the life of your system.
- Cost Savings: Better to invest a little now in DIY care than a whole lot later for professional repairs.
- Home Value: Believe it or not, a well-maintained septic system can actually add value to your property.
The DIY Spirit
Now, I’ve been in the septic tank business for over 20 years, and I’ve seen it all—the good, the bad, and the downright ugly. You’d be surprised how a little bit of DIY effort can make a significant difference. Sure, there are times when you’ve got to call in the big guns, but DIY septic tank treatment can often prevent those four-digit repair bills from popping up. Plus, there’s something gratifying about rolling up your sleeves and tackling the job yourself.
- Personal Connection: Knowing your septic system inside and out (not literally, y’all!) helps you detect problems early.
- Empowerment: There’s a sense of pride in maintaining your own home, right down to its unmentionable bowels.
So, whether you’re a DIY veteran or just dabbling for the first time, keep reading. We’re gonna dive into the nitty-gritty of DIY septic tank treatment—from why it’s a good idea to how to do it, and what to watch out for. And don’t worry, I promise to make it as painless and as fun as talking about waste management can possibly be.
Alright, that’s enough chit-chat for now. Got your gloves and your can-do attitude ready? Let’s get this party started!
Well, there you have it, the first section of our deep dive into DIY septic tank treatment. Ready to roll up your sleeves and dig into the next part? Let me know when you’re all set!
Why DIY? The Benefits and Limitations: Where Grit Meets Wit in Septic Tank Care
Alrighty then, you’re still here, which means I haven’t scared you off yet—that’s a good sign! Now, folks, let’s rap about the pros and cons of this DIY septic tank treatment business. I mean, there’s gotta be a reason why we’re all choosing to spend our Saturdays hunched over a septic tank rather than enjoying a cold one by the lake, am I right?
The Almighty Dollar: Cost-Effectiveness
First off, let’s talk about the moolah you’ll save. Professional septic tank treatments can really take a bite out of your wallet. You’re paying for the service, the equipment, and their expertise. All necessary, of course, but that adds up!
- Less Overhead: With DIY, you pay for the materials and invest a bit of sweat equity—that’s it!
- No Labor Costs: No hourly rates, no service fees, just the good ol’ satisfaction of a job well done.
Your Tank, Your Rules: Customization
Now, when you’re in charge, you can tweak things as you see fit. Different tanks have different needs, just like people. Maybe yours needs a good flush, or perhaps just a bacterial boost to keep things moving smoothly.
- Tailored Treatment: You can adjust the type and frequency of treatment based on your system’s needs.
- Experiment Safely: With the proper knowledge (which you’ll get here, don’t worry), you can try different things to see what works best for your septic environment.
Know Thy Limits: When to Call in the Pros
But folks, I’ve got to put on my serious hat for a moment here. DIY septic tank treatment ain’t a cure-all. Sometimes, the situation is too far gone, or too complex for your everyday homeowner to handle. Remember, I’ve been doing this for two decades, and there are still moments that make me go, “Well, darn!”
- Big Problems Need Big Solutions: Issues like major leaks or structural damage are not DIY-friendly. Period.
- Knowledge Gap: If you’re not sure what you’re doing, it’s easy to make a bad situation worse. When in doubt, seek expert advice.
So there you have it, the ups and downs, the good, the bad, and the stinky of DIY septic tank treatment. The key takeaway here is balance. Know when to DIY and when to call a guy like me, who’s seen enough septic tanks to write a country song about ’em.
Up for more? Stick around, because next, we’re diving into the toolbox to get you geared up for your DIY adventure. Let me know if you’re ready to move on!
Essential Tools and Materials for DIY Septic Tank Treatment: Gearing Up for Septic Success!
Heck yes, you’re still with me! Time to talk tools and materials. If you’re gonna venture into the world of DIY septic tank treatment, you’ve got to come prepared. It’s like going fishing—you wouldn’t hit the lake without your fishing pole and tackle box, right? Well, same goes for taking care of your septic tank.
What You’ll Need: The Must-Haves
Gather ’round, kiddos, because here’s the list of items you’ll need to get this job done right.
- Rubber Gloves: This one’s a no-brainer. Unless you want a personal relationship with your waste, gloves are a must.
- Face Mask: Trust me, you don’t want to breathe in those fumes. A basic mask will do.
- Bucket: For measuring and mixing any treatments.
- Long-Handled Spoon or Stick: To stir up your mixtures before pouring them in.
- Septic System Additives: Whether you’re going the natural route with things like yeast or vinegar, or you’re opting for chemical treatments.
- Flashlight: For peering into the depths of your septic system. What treasures await?
Where to Find Them: Scavenger Hunt Time!
- Hardware Stores: Your local hardware shop should have the basics like gloves, buckets, and flashlights.
- Grocery Stores: For natural treatments like baking soda, vinegar, or yeast.
- Online Retailers: A good option for specialty septic system additives that may not be available locally.
- Your Own Garage: Hey, you might already have some of these items lying around! Always a win when that happens.
Safety First: Because Nobody Likes Accidents
Let’s not mince words, folks—while septic tank treatment can be a hoot, it’s not without its hazards.
- Chemical Safety: Always read the label and follow directions for any chemical additives.
- Fumes and Ventilation: If you’re using stronger chemicals, make sure the area is well-ventilated.
- Protective Gear: In addition to gloves and a mask, wear old clothes you don’t mind getting dirty (or downright ruined).
And there you have it—your complete guide to the essential tools and materials for DIY septic tank treatment! Now you’re geared up and ready for the next stage of this exciting journey into the bowels of your property. Stay tuned, because we’re about to delve into some science stuff—don’t worry, I’ll keep it fun!
Ready for more? Give me the thumbs-up and we’ll move right along!
Understanding the Science Behind Septic Systems: Getting the Lowdown on Your Below-Ground Buddy

Yeehaw! Now that you’re all geared up, let’s dig into the science of how these miraculous waste-eaters actually work. Don’t worry, I won’t get all lab-coat-and-goggles on you, but a little knowledge can go a long way, especially when we’re talking about something as intricate as a septic system.
How a Septic Tank Works: The Basics
Alright, so, picture your septic tank as a big ol’ underground stomach. Waste flows into the tank from your house, where it gets separated. The heavy stuff, known as sludge, settles to the bottom, while the lighter stuff, called scum, floats to the top. In the middle is the liquid wastewater, which eventually makes its way out to your drain field.
- Inlet and Outlet: The tank has both an inlet pipe (where the waste comes in) and an outlet pipe (where the treated liquid exits).
- Retention Time: The tank holds waste long enough for the solids to settle and the liquids to be treated before exiting.
Role of Bacteria: Your Tiny Waste Warriors
Now, this is where it gets fascinating, folks. There’s a whole army of bacteria in your septic tank, and they’re the real MVPs. These little guys break down the solid waste into simpler substances, making it easier for the liquid to pass through and get treated.
- Anaerobic Bacteria: These don’t need oxygen and do most of the heavy lifting.
- Beneficial Additives: Some treatments add more bacteria to help with the breakdown process.
What Can Go Wrong: Don’t Ignore the Warning Signs
As much as I’d love to tell you that your septic system will run smoothly forever, I gotta be honest—things can go south. Common problems include:
- Overflows and Backups: Usually from too much solid waste accumulating.
- Foul Odors: A stinky yard can often mean something’s amiss.
- Slow Drains: A sign that your septic system may be struggling.
- Chemical Imbalance: Overuse of household cleaners can kill off those helpful bacteria.
The good news is that regular DIY septic tank treatment can help you avoid most of these issues, or at least catch ’em early before they turn into a full-blown crisis.
And there you go—Septic Systems 101, taught by yours truly! Trust me, knowing what’s going on underground will make your DIY treatments a whole lot more effective. Up next, we’re gonna explore some natural and chemical treatment options. Ready to keep the fun going? Let me know and we’ll get right to it!
Natural DIY Septic Tank Treatments: Go Green While Cleaning the Brown!
Haha, welcome back, adventurers! Now, I’m sure you’re just itching to get your hands dirty—figuratively speaking, of course. So, let’s talk about some natural DIY septic tank treatments. They’re like the chicken soup for your septic system’s soul. Environmentally friendly, easy to find, and they won’t break the bank.
Baking Soda and Vinegar: The Dynamic Duo
Ah, baking soda and vinegar, the Batman and Robin of natural cleaners! Separate, they’re great; together, they’re unstoppable.
- How It Works: Baking soda acts as a cleaner and deodorizer, while vinegar helps break down scum.
- Application: Pour a cup of baking soda into your toilet, followed by a cup of vinegar. Wait a few minutes for the fizz to die down, then flush.
Yeast: Not Just for Bread Anymore
Yeast is another great option. Yes, the same stuff that makes your bread rise can also keep your septic tank happy.
- How It Works: Yeast helps to break down starches and other organic matter in the tank.
- Application: Just flush a packet of active dry yeast down the toilet. Easy-peasy.
Other Organic Options: Get Creative!
For those who like to live on the edge, there are other natural solutions to consider.
- Citrus-Based Cleaners: Citrus can act as a degreaser and helps keep odors at bay.
- Enzyme Treatments: These are available at specialty stores and help boost the bacteria in your system.
Now, while these natural treatments are awesome, remember they’re more for maintenance and prevention. If you’ve got a serious problem brewing, it’s time to call in the professionals. But for regular upkeep, these natural DIY septic tank treatments can be real lifesavers!
So, there you have it, friends. A down-to-earth guide to upkeeping what’s under the earth—your septic system. Are you ready to get into some of the more heavy-duty chemical options, or did you have another question on your mind? Let me know what you’re thinking, and we’ll keep this party rollin’!
Chemical DIY Septic Tank Treatments: The High-Octane Boost Your Tank May Need
Glad to see you’re still hanging in there, you brave souls! Now, while I’m all for natural treatments, there are times when you gotta bring out the big guns. Yep, I’m talking about chemical DIY septic tank treatments. They’re the drag racers of the septic world—fast, effective, but also a bit risky if you don’t handle ’em carefully.
Types of Chemical Treatments Available: Pick Your Poison
So, let’s get acquainted with the chemical cavalry, shall we?
- Acid-Based Treatments: These can dissolve organic material, but be warned, they’re not for the faint-hearted or the inexperienced.
- Alkaline-Based Treatments: These help break down grease and can neutralize acidic conditions.
- Biological Additives: These contain enzymes and bacteria to help accelerate waste decomposition.
When to Use Them: Timing is Everything
Alright, the question on everyone’s mind: “When do I use these chemical wonders?”
- Heavy Sludge Buildup: When you’ve got an accumulation of solids that your natural treatments just can’t handle.
- Odor Control: Some chemicals can neutralize those gnarly smells.
- Preventative Measures: In between professional treatments to keep things ticking over smoothly.
Precautions and Safety: Don’t Get Carried Away, Now
I can’t stress this enough: safety first, folks!
- Always Read Labels: Know what you’re pouring into your septic system. Some chemicals might be too harsh.
- Ventilation is Key: Always ensure the area is well-ventilated, especially when using acid-based treatments.
- Personal Protective Equipment (PPE): Yep, that means goggles, gloves, and maybe even a face shield.
So, in a nutshell, chemical DIY septic tank treatments are like your septic system’s espresso shot: they give a powerful boost, but too much can lead to jitters—or worse, a breakdown.
Alright, so you’ve got the lowdown on both natural and chemical treatments. What’s next? You wanna delve into some common issues and how to troubleshoot them? Or perhaps you have a burning question? Hit me up and let’s keep this ball rollin’!
Monitoring and Maintenance: Keepin’ an Eagle Eye on Your Septic Buddy

Howdy, partners! If you’ve made it this far, give yourselves a big ol’ pat on the back. You’re now pretty well-versed in the art of DIY septic tank treatment. But hold your horses; we’re not done yet! Understanding how to monitor and maintain your septic system is like knowing when to reel in a big fish—timing and signs are everything.
Signs That Your DIY Septic Tank Treatment is Working: The Good Vibes
Ever wonder how you’ll know if your DIY concoctions are actually doing the trick? Well, here ya go:
- Reduced Odors: A less stinky yard is always a good sign.
- Better Drainage: If your sinks and tubs are draining faster, take that as a win!
- No Backups: No wastewater making a guest appearance in your home? You’re on the right track.
When to Retreat: Round Two, Fight!
Just like you wouldn’t service your truck once and forget about it, your septic system needs regular lovin’ too.
- Routine Checks: About every 3-6 months is a good rule of thumb for most DIY treatments.
- After Heavy Usage: Family reunion or holiday season might mean your system needs some extra TLC.
Long-Term Care Tips: The Gift That Keeps on Giving
Sure, DIY treatments are great, but they’re part of a larger care routine.
- Regular Pumping: Every 3-5 years, give or take, get a professional to pump out your system.
- Inspections: Consider a yearly professional check-up to spot any potential issues.
- Mind What You Flush: No fats, oils, or non-biodegradable items down the drain. Your septic system ain’t a trash can!
Remember, friends, a well-maintained septic system is like a well-tuned guitar; it brings harmony to your home. Keeping a vigilant eye on it ensures you’re not in for any nasty surprises down the road.
So, what’s the verdict? Ready for the FAQs, or got some more questions? Let me know how you’d like to proceed!
Legal and Environmental Considerations: Playing it Smart and Green
Well, howdy again! By now, you’re practically a DIY septic tank treatment whiz. But let’s pump the brakes a minute, shall we? Knowing how to treat your septic system is grand, but you also gotta know the rules of the road and the lay of the land—legally and environmentally speaking, of course.
Understanding Local Laws: Don’t Get Caught with Your Pants Down
I reckon none of us want to tango with the law, especially when it comes to waste management.
- Permits: Some localities require permits for certain types of septic treatments. Always check with your county or town office.
- Usage Guidelines: Believe it or not, the type of treatment you use could be regulated, especially if you’re near a water source.
The Environmental Impact of DIY Septic Tank Treatments: Good for Your Tank, Good for Mother Earth?
We all want to be good stewards of this beautiful planet, right? So let’s talk impact.
- Chemical Treatments: These can be effective but are usually less eco-friendly. Some chemicals can leach into the soil and contaminate groundwater.
- Natural Treatments: Generally more environmentally friendly, as they break down easier and are less harmful to the ecosystem.
- Waste Management: Keep in mind that what goes in must come out—usually in the form of treated wastewater. The cleaner your system, the less impact it has on your local environment.
So, folks, remember, taking care of your septic system is a responsibility—not just to your household but to your community and the environment too. Always check local laws and aim for treatments that are as kind to Mother Earth as they are effective.
What’s next? Do y’all have any more questions or should we dive into some FAQs? Let me know what you’re thinking!
Is DIY septic tank treatment effective compared to professional services?
Let’s get one thing straight: DIY treatments are fantastic for maintenance and minor issues, but they’re not a full-on substitute for professional services. Think of it this way: DIY is like brushing your teeth daily, and professional treatment is like visiting the dentist for a deep clean.
How often should I perform a DIY septic tank treatment?
I’d say about every 3-6 months is good for most homes, but the exact frequency can depend on various factors like the size of your household, the age of your septic system, and how much it’s used.
Are there any risks involved with DIY septic tank treatment?
There’s always a bit of risk, especially if you opt for chemical treatments without taking proper safety precautions. Incorrectly mixed chemicals can harm your system or even lead to dangerous reactions. Always follow guidelines and consider the environmental impact.
What are some signs that DIY septic tank treatment isn’t enough and I need professional help?
If you’re facing frequent backups, persistent bad odors, or pooling water around the drain field, those are big red flags. Also, if your DIY treatments aren’t improving drainage or reducing odors, it’s time to call in the pros.
Can DIY septic tank treatment harm the environment?
It certainly can if you’re not careful. Chemical treatments, especially, can be harmful if they leach into the soil and contaminate groundwater. Always opt for environmentally friendly options when possible and adhere to local laws and guidelines.
There ya have it, the 411 on DIY septic tank treatment, hot off the press! If you’ve got more questions, don’t be shy. Just holler, and I’ll do my best to help you out. What’s next on the agenda?
